Changes in the New FCM API
Old API Request:
- POST https://fcm.googleapis.com/fcm/send
New API Request:
- POST https://fcm.googleapis.com/v1/projects/{your_project_name}/messages:send
(Replace {your_project_name} with your actual Firebase project name.)
Old Authorization Header:
- Authorization: key=AIzaSyZ-1u...0GBYzPu7Udno5aA
New Authorization Header:
- Authorization: Bearer ya29.ElqKBGN2Ri_Uz...HnS_uNreA
The major change here is that you now need to generate a dynamic authorization token rather than using a static Web API key. ~
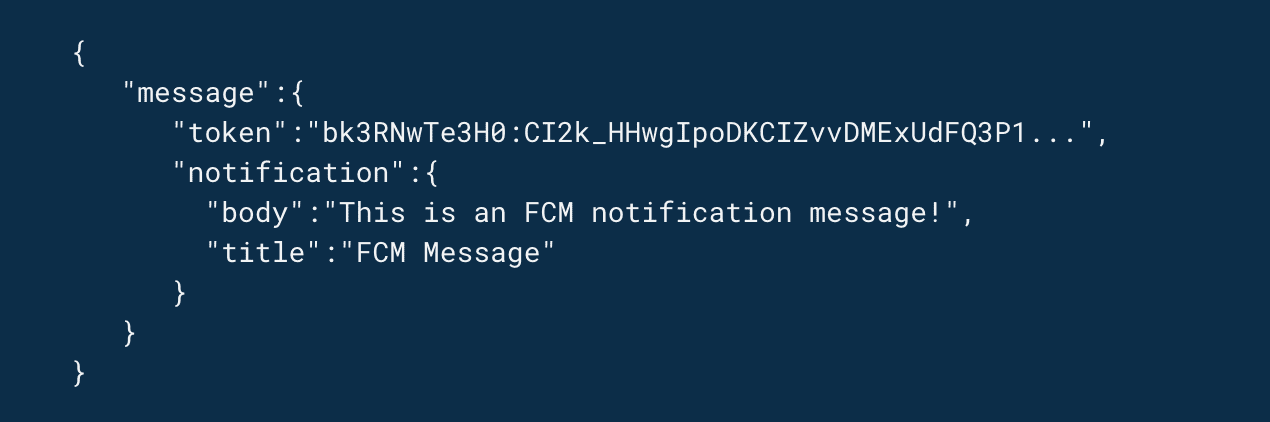
Old Request Body:

New Request Body:
Steps to Send Notifications with the New FCM API
Step 1: Create a Firebase Project
Before you can send notifications, ensure you have a Firebase project set up and that your app is added to this project. If not, go to the Firebase Console and create your project.
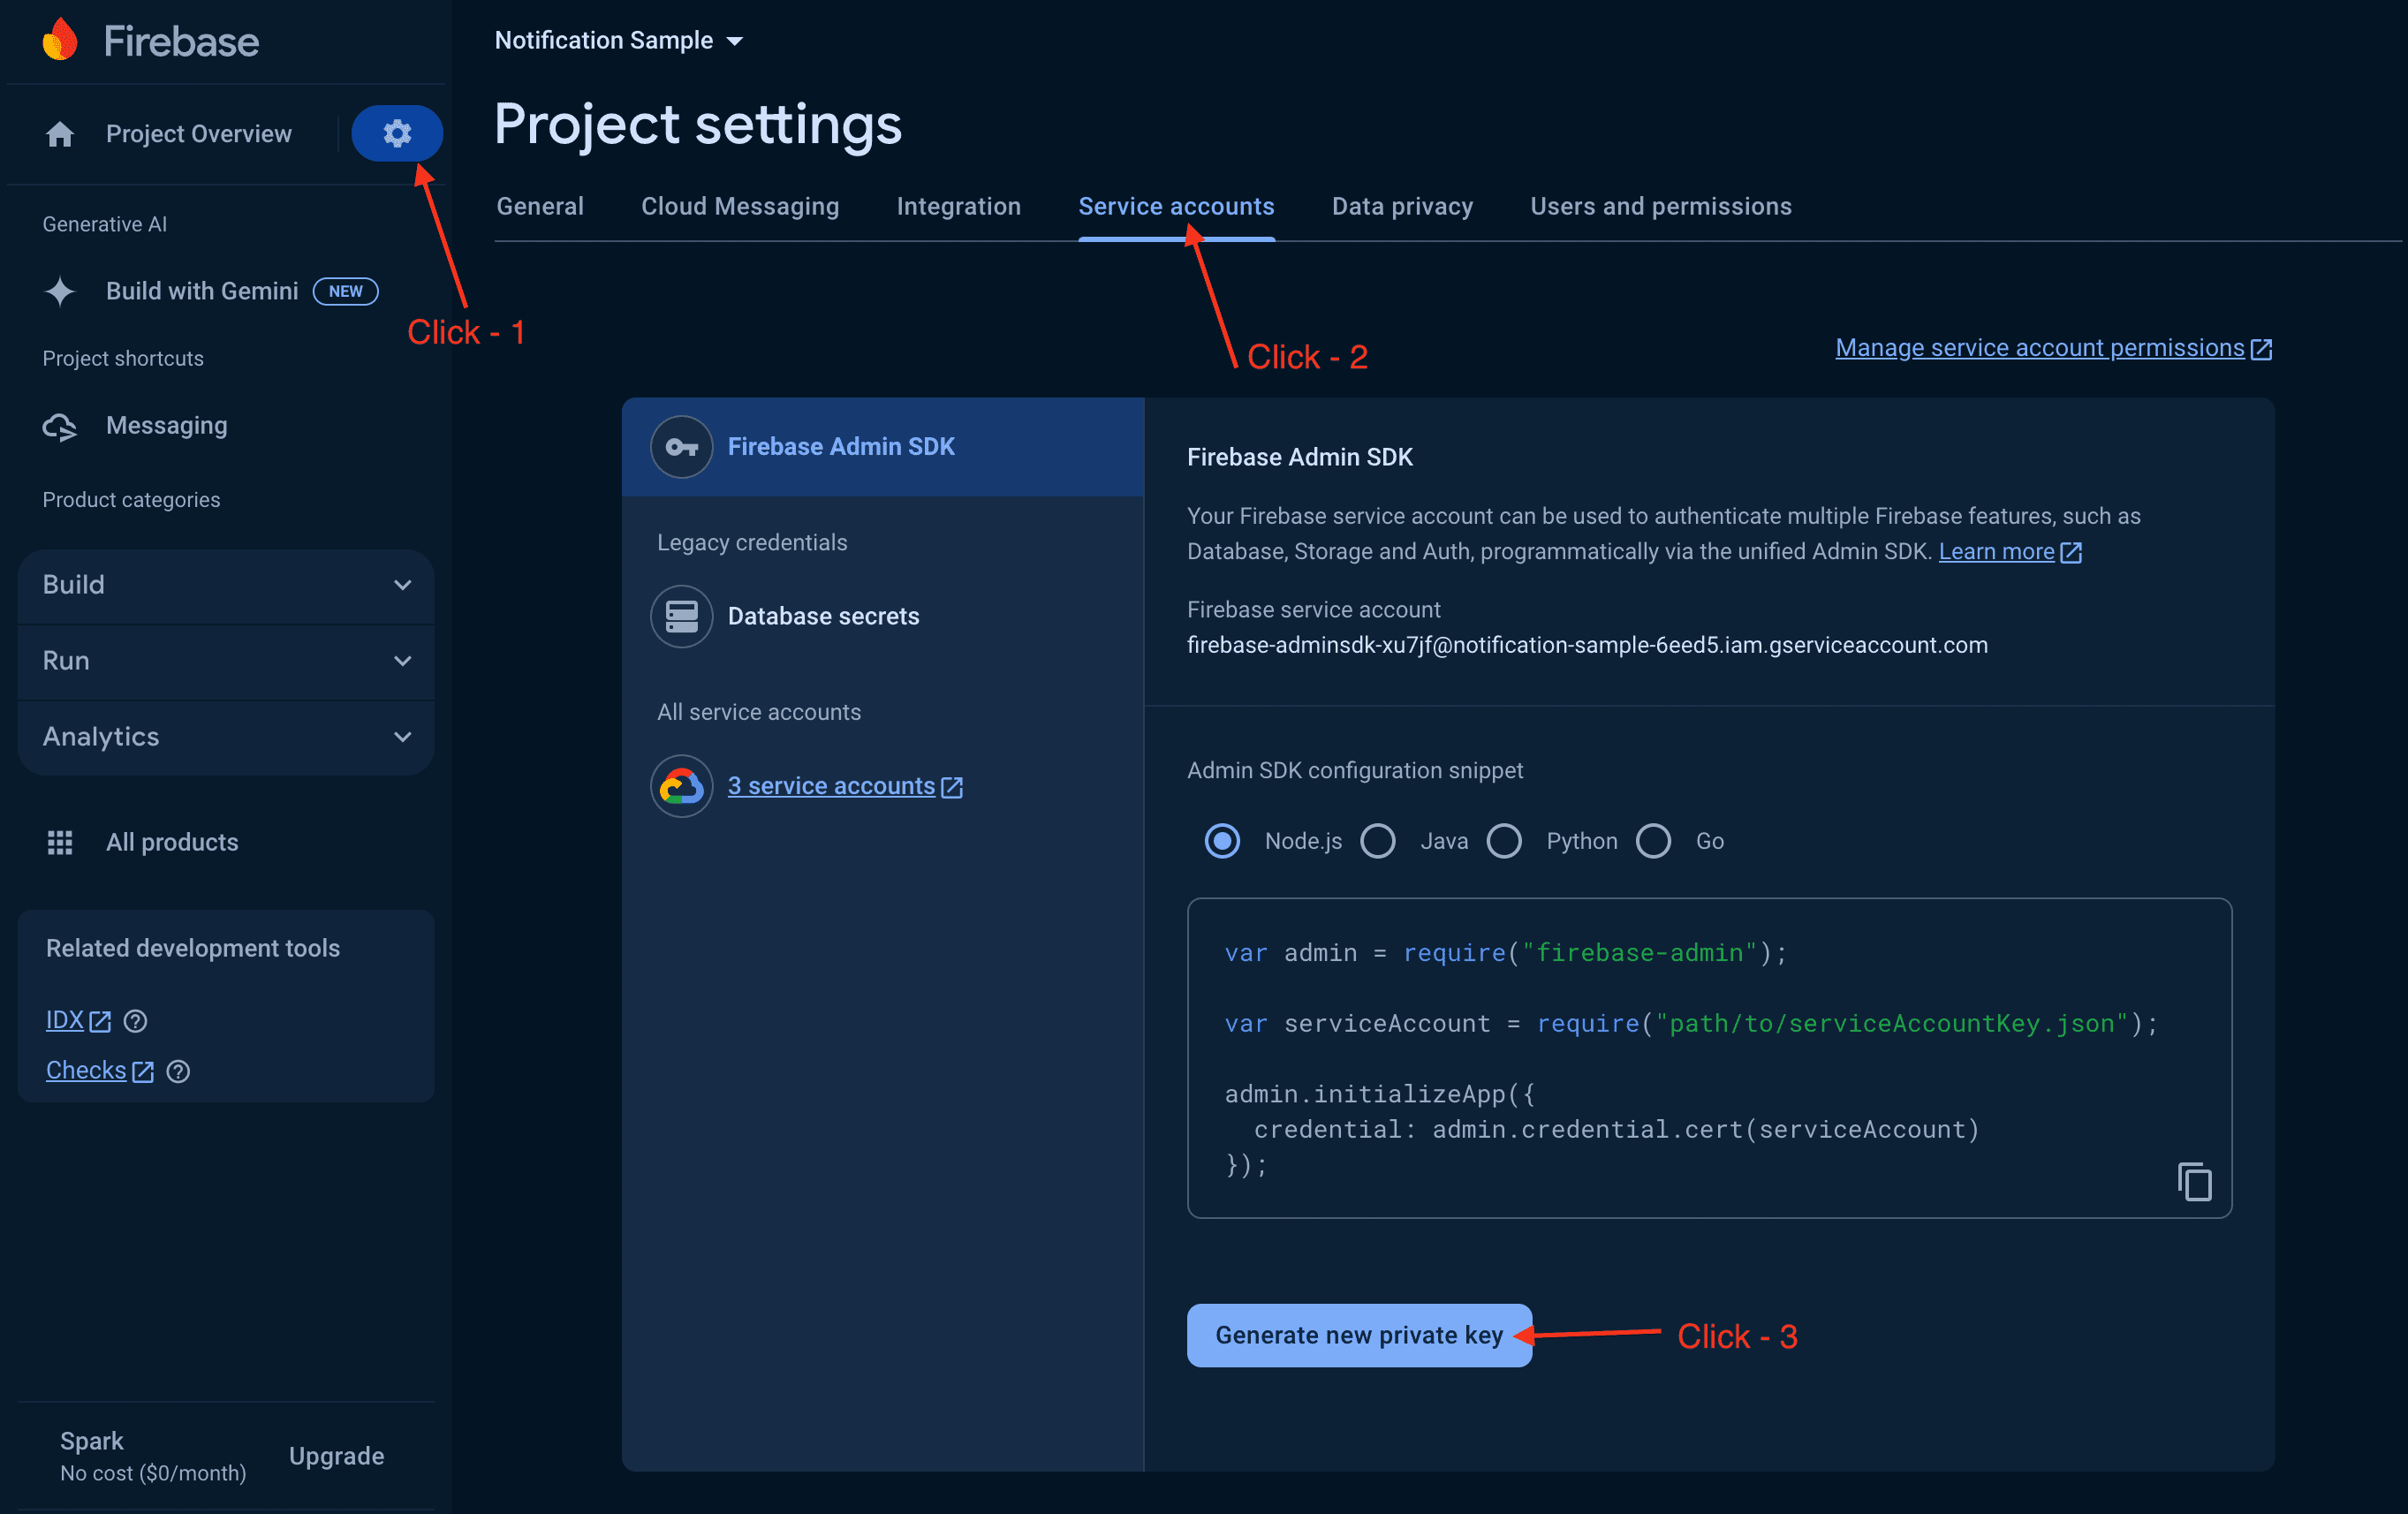
Once your project is created:
- Navigate to Project Settings.
- Select the Service Account tab.
- Choose your preferred SDK configuration (Node.js is used in this example).
- Click on Generate New Private Key to download the service_account.json file. This file is required for generating the authorization token.
Step 2: Generate an Authorization Token
To send notifications, you need to generate a dynamic authorization token. This is done using the downloaded service_account.json file. Here’s how you can generate the token:
Download Node Js Project for generate Authorization token
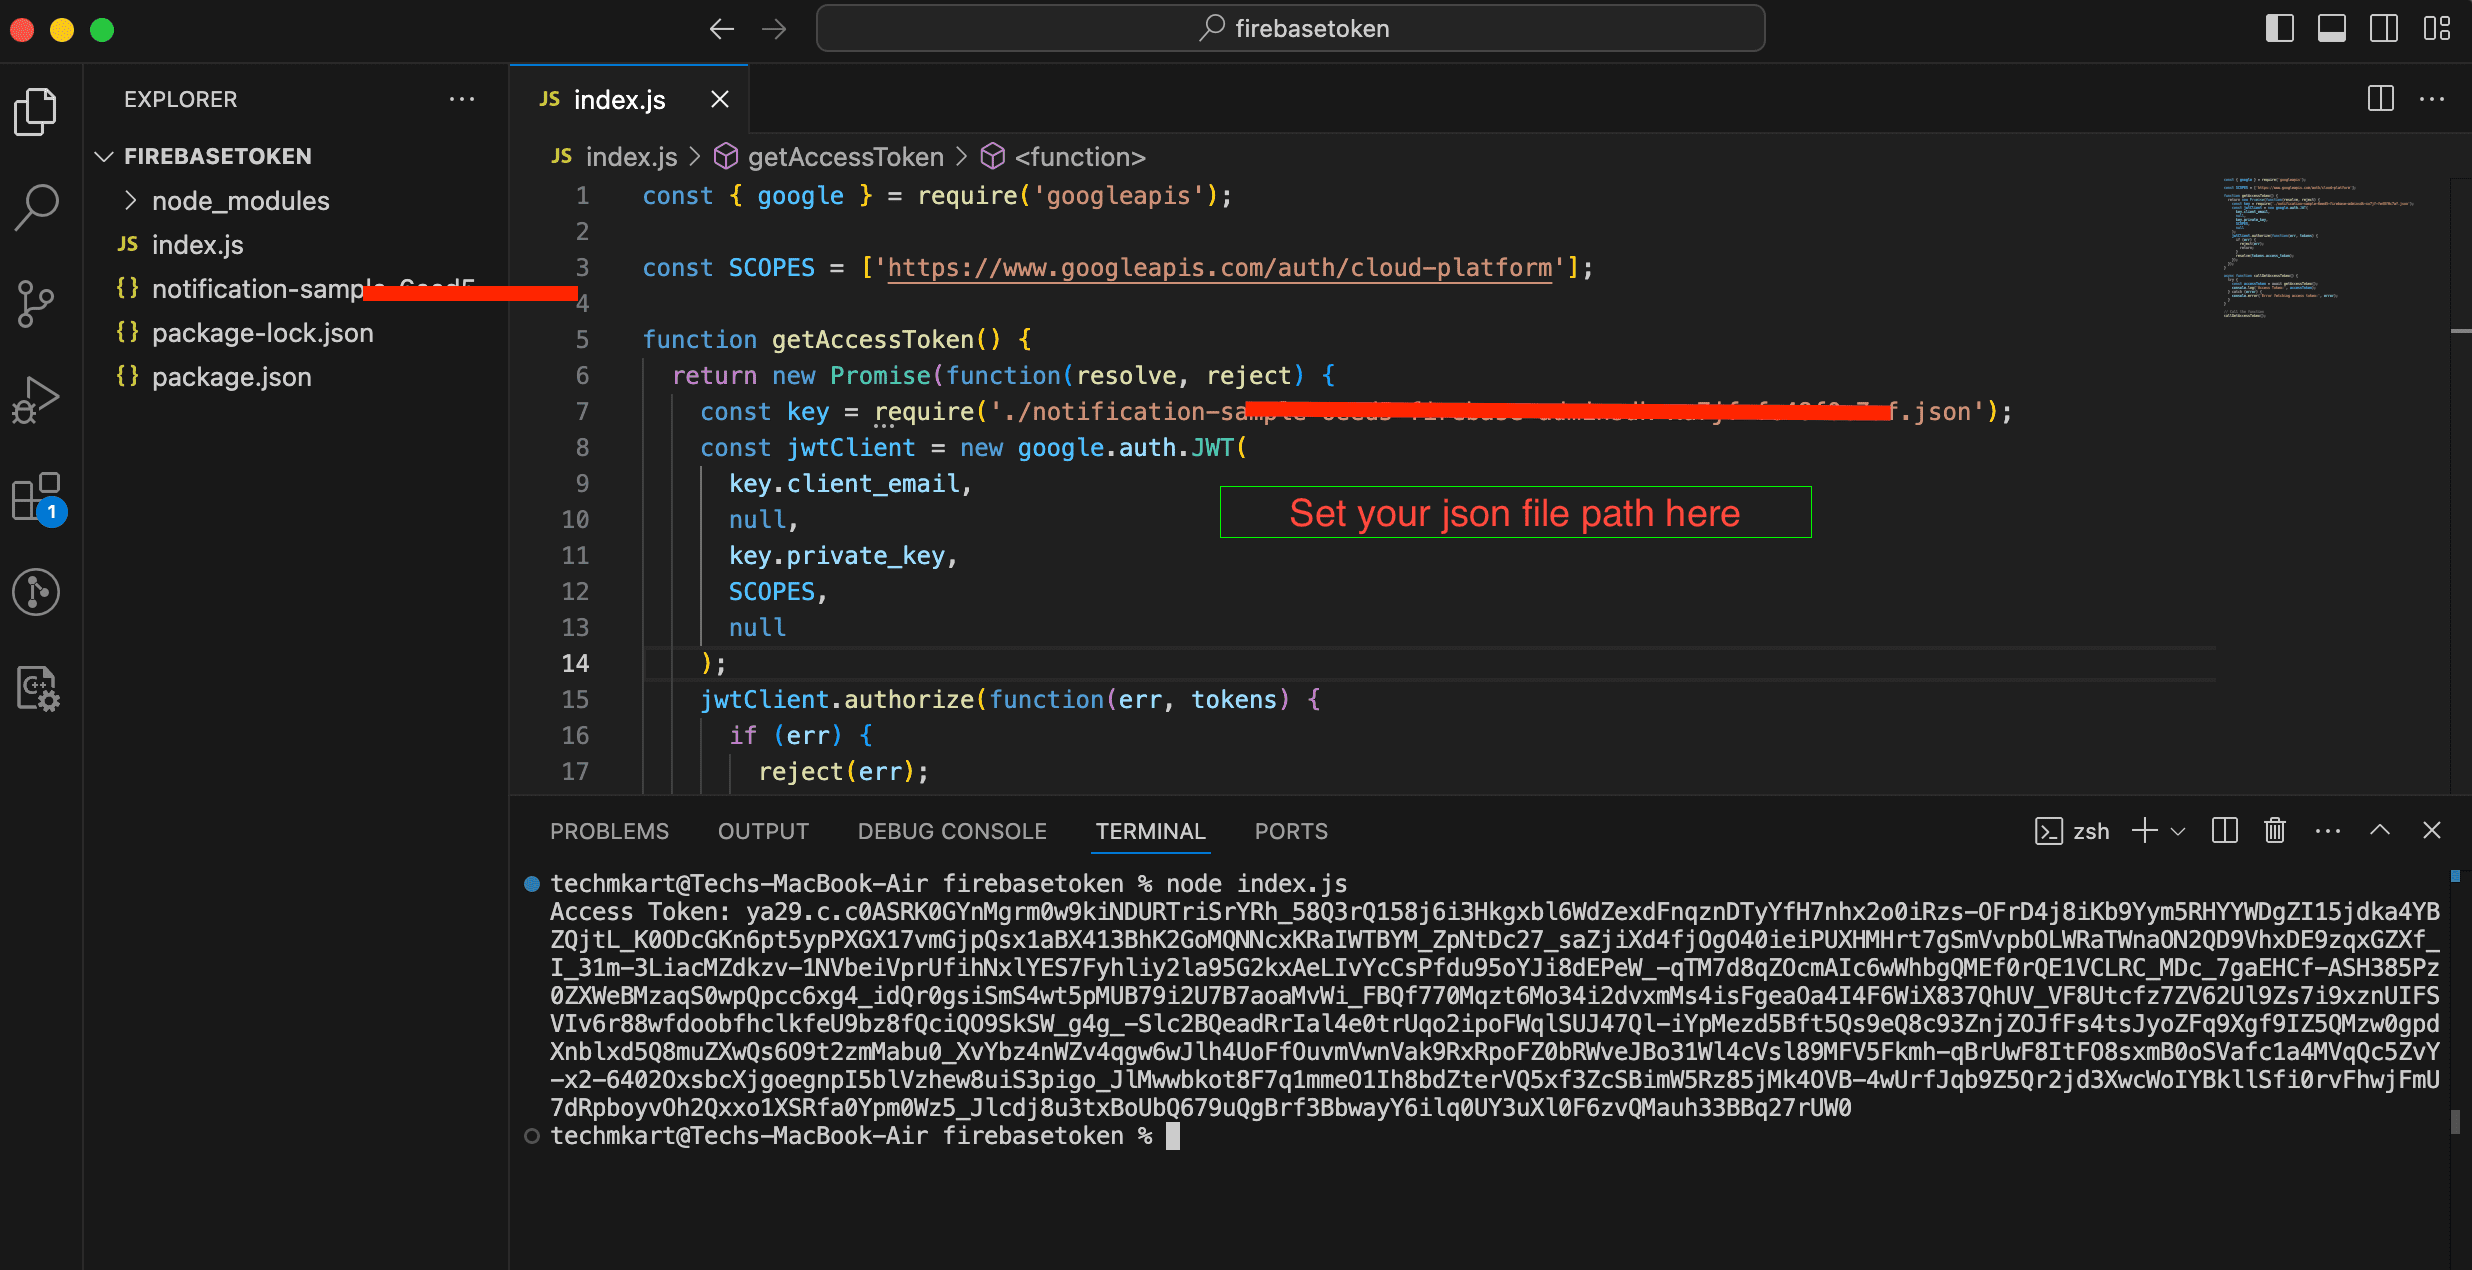
Noje js Project- Create a Node Js project on your machine.
- Download the required Node Js source code for generating the token.
- Replace the placeholder service_account.json file with the one you downloaded in Step 1.
- Run the command npm install to install the necessary modules.
- Run the script with node index.js to generate the authorization token.
Once you run the script, you’ll get an authorization token, which you’ll use to send push notifications.
Step 3: Send Push Notifications
Now that you have your Authorization token, you can use the new FCM API to send push notifications.
Here’s how:
Use the new endpoint:
POST https://fcm.googleapis.com/v1/projects/{your_project_name}/messages:send
Replace {your_project_name} with your actual project name.
Set the authorization header:
Authorization: Bearer {your_generated_token}
Replace {your_generated_token} with the token obtained in Step 2.
Prepare the request body with your FCM token.
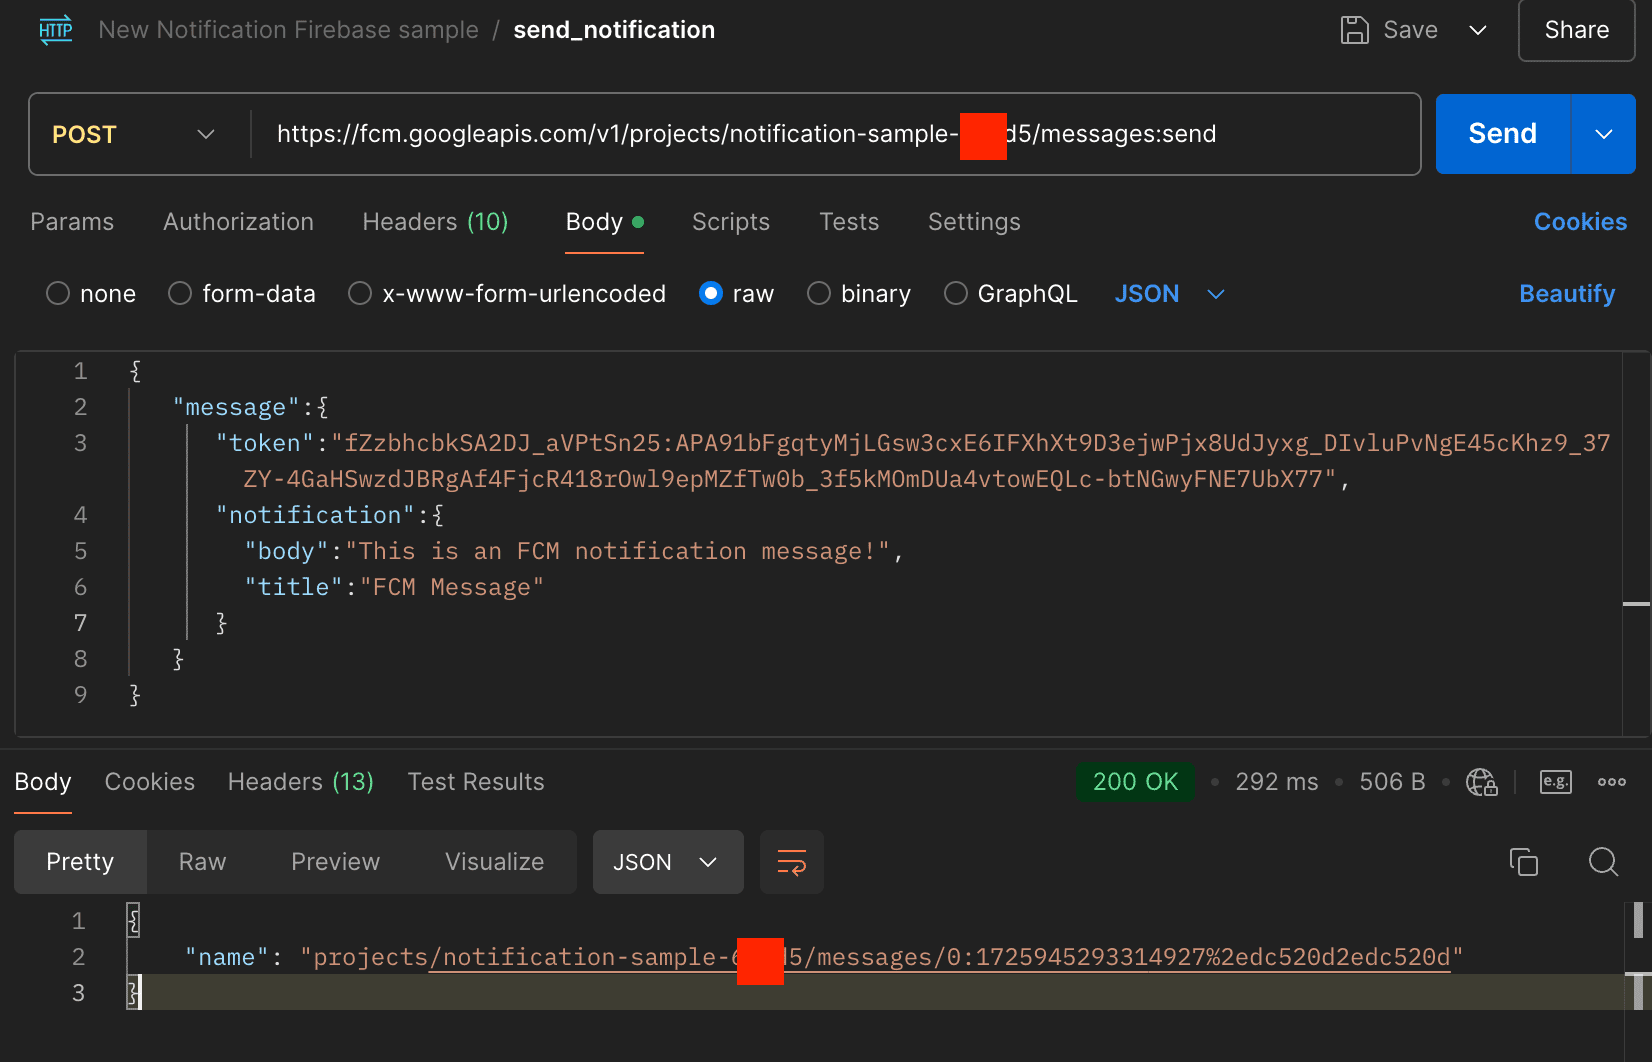
Call the API and send the request. If everything is set up correctly, you should receive the notification on your device.
Conclusion
Migrating to the new FCM HTTP v1 API is essential for continued support and functionality of Firebase push notifications. The main change involves using a dynamic authorization token rather than a static Web API key, and altering the request body format slightly. By following the steps outlined above, you can successfully migrate your notification system to the new API.
Thank you for reading!
